Getting Started
Understanding the dashboard
A map of formbase outside the editor. Skim once — every section links to a dedicated page when you want depth.
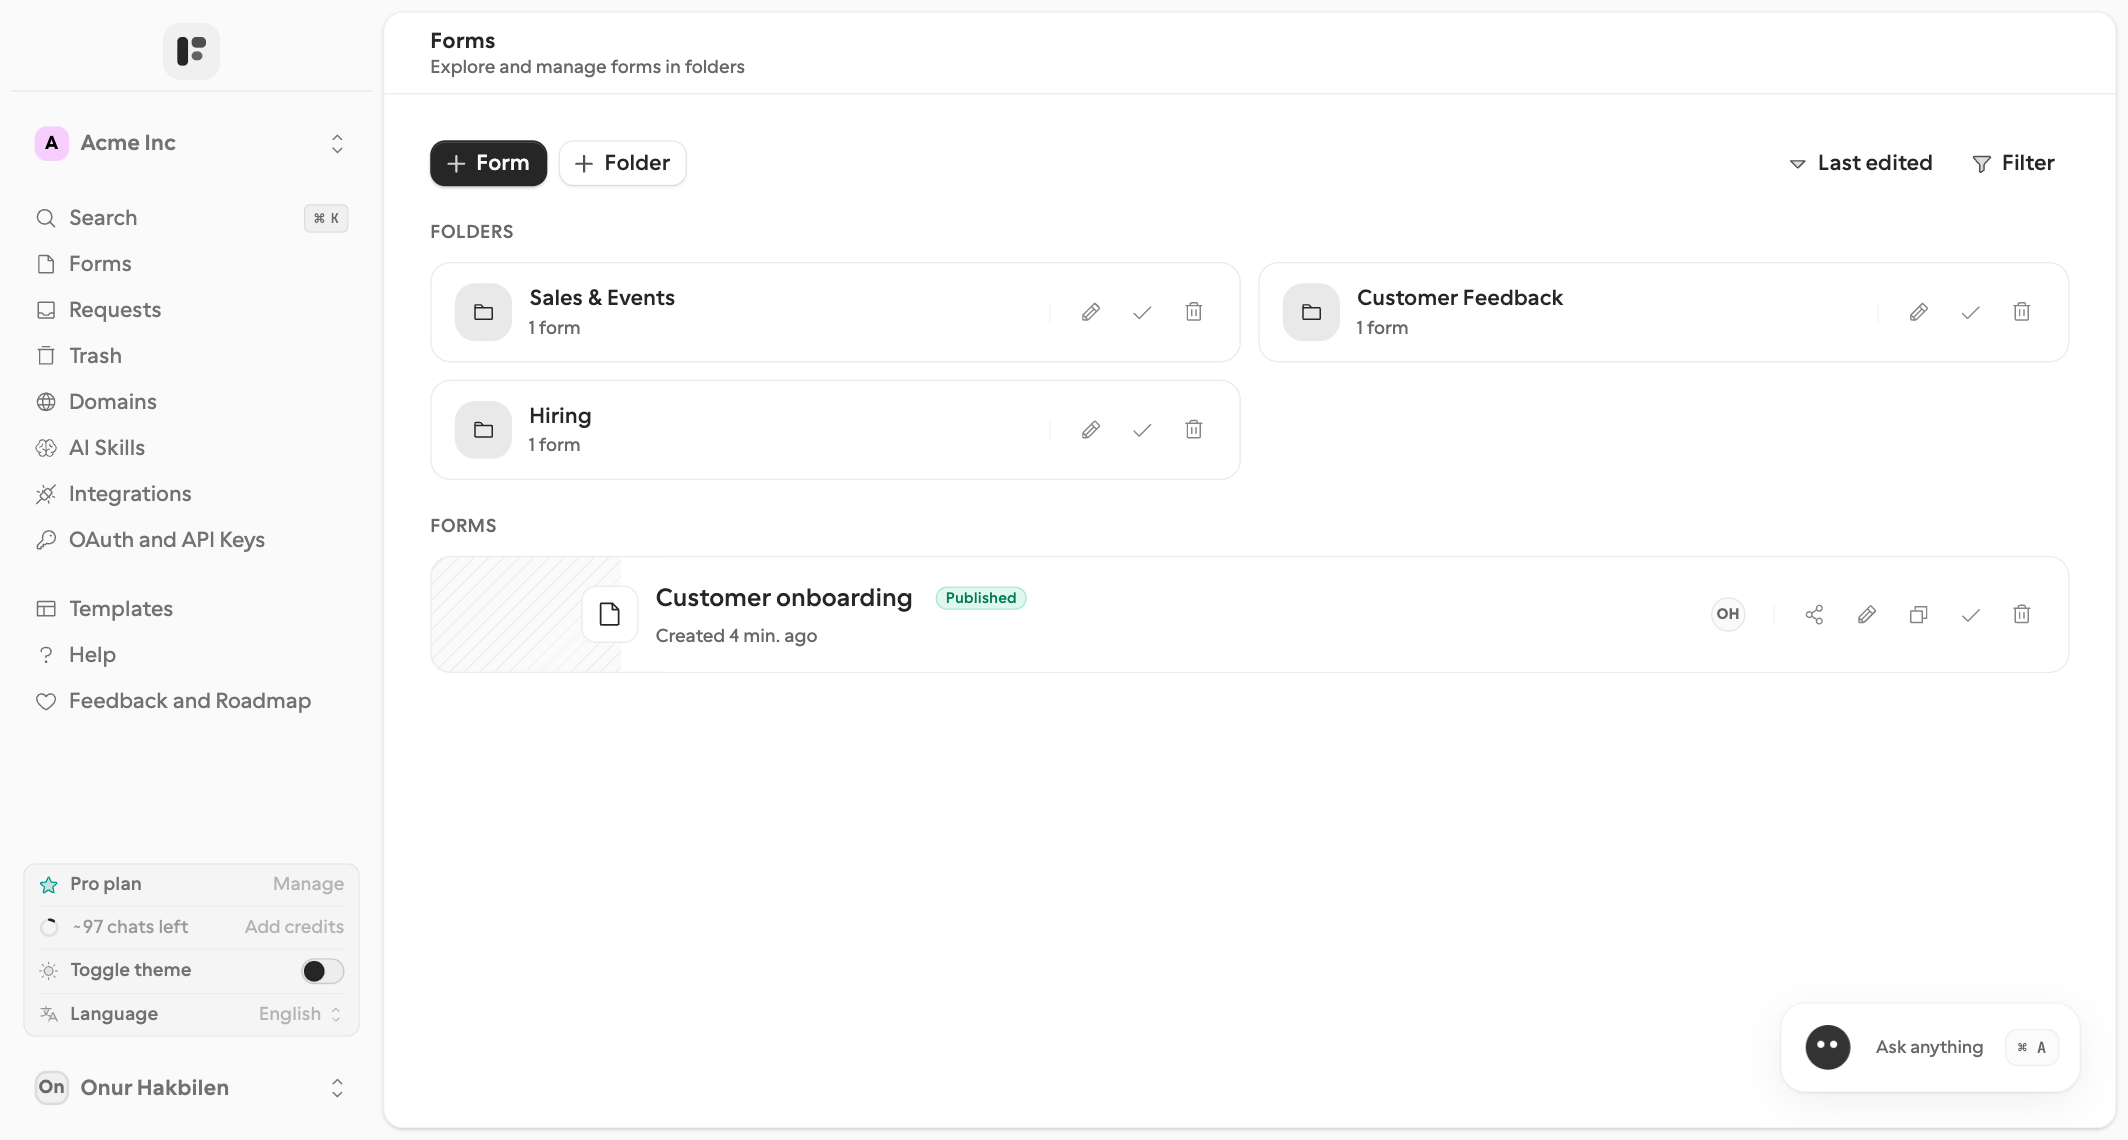
The layout
Three regions:
Sidebar (left) — workspace switcher, navigation, plan and AI credits, your profile.
Main area (center) — whichever page you opened. The default is Forms, the folder explorer.
AI launcher (bottom-right) — the button that opens AI chat in a panel on the right.
Two shortcuts work anywhere: ⌘+K / Ctrl+K opens search, and ⌘+A / Ctrl+A opens and closes AI chat.
Workspace switcher
Top of the sidebar. Click to switch workspaces, create a new one, open Workspace Settings, or leave a workspace you don’t own. Workspaces overview →
Sidebar navigation
One line each — follow the link for full docs.
Search — the same palette as ⌘+K: jump to any form, page, or action.
Forms — the folder explorer, and where Form and Folder create new ones. Rename, duplicate, move, share, delete. Sort by name, created date, or last edited; filter by status or editor. Folders →
Requests — everything you are waiting on from customers, across every form: status, reminders, and callbacks. Open one for its timeline. The Requests page →
Trash — deleted forms. Restore one to a folder of your choice, or delete it for good. After 30 days formbase removes it for you. Trash →
Domains — share domains for your links, email domains for your sending address, and your Cloudflare Turnstile keys (Pro). Custom domains →
AI Skills — teach the AI reusable domain knowledge, tone rules, and question guides your whole team can apply (Pro). AI overview →
Integrations — workspace-wide connections (Google Sheets, Slack, Notion, etc.) reusable across forms. See integrations →
OAuth and API Keys — API tokens and connected apps for programmatic access, scoped to the active workspace. API tokens →
Below that:
Templates — 19 ready-made forms in six categories (Requests, Business, Feedback, Events, HR, Support). Click one and it becomes a new form in this workspace.
Help — a page of links into these docs, plus a way to reach support.
Feedback and Roadmap — opens the public board where you can send feedback and follow what’s coming next.
Plan, credits, theme, and language
Just above your avatar sits one card with four rows:
Free plan / Pro plan / Business plan — with Upgrade or Manage on the right, which opens the subscription page.
AI credits — your balance, shown as an estimate of chats left. Add credits tops it up. Credits belong to you, not to the workspace; a Business owner can switch on Share my AI credits with members so the workspace draws from their balance instead. AI credits & usage →
Toggle theme — a switch between light and dark. Appearance →
Language — the dashboard language: Automatic, English, Norsk, Deutsch, Nederlands, Français, Español, or Türkçe. It does not change what your respondents see. Form language →
Your profile
Click your avatar at the very bottom of the sidebar. The menu has two items:
Settings — opens Account Settings: your photo and display name, the sign-in method linked to the account, and Delete Account.
Log out.
AI chat
The button in the bottom-right opens AI chat — an assistant that can create, edit, and analyze your forms. It is on every page, and ⌘+A / Ctrl+A opens and closes it. For what it can do, see AI chat in the editor guide and AI overview.
Connect your own agent
Prefer Claude, ChatGPT, Cursor, or another tool? See Connect an AI agent.
Settings — what lives where
Workspace Settings (workspace switcher → Workspace Settings) — workspace name, timezone, notification email language, AI credit sharing, members and the invite link, and deleting the workspace. Members can open it and invite; renaming, removing members, and deleting need the owner. Inviting members →
Account Settings (avatar → Settings) — your photo and display name, sign-in method, delete account.
Form settings — per-form, from Settings in the editor toolbar: General, Access, Submissions, E-mail Notifications, Integrations, and Danger Zone. Form settings →